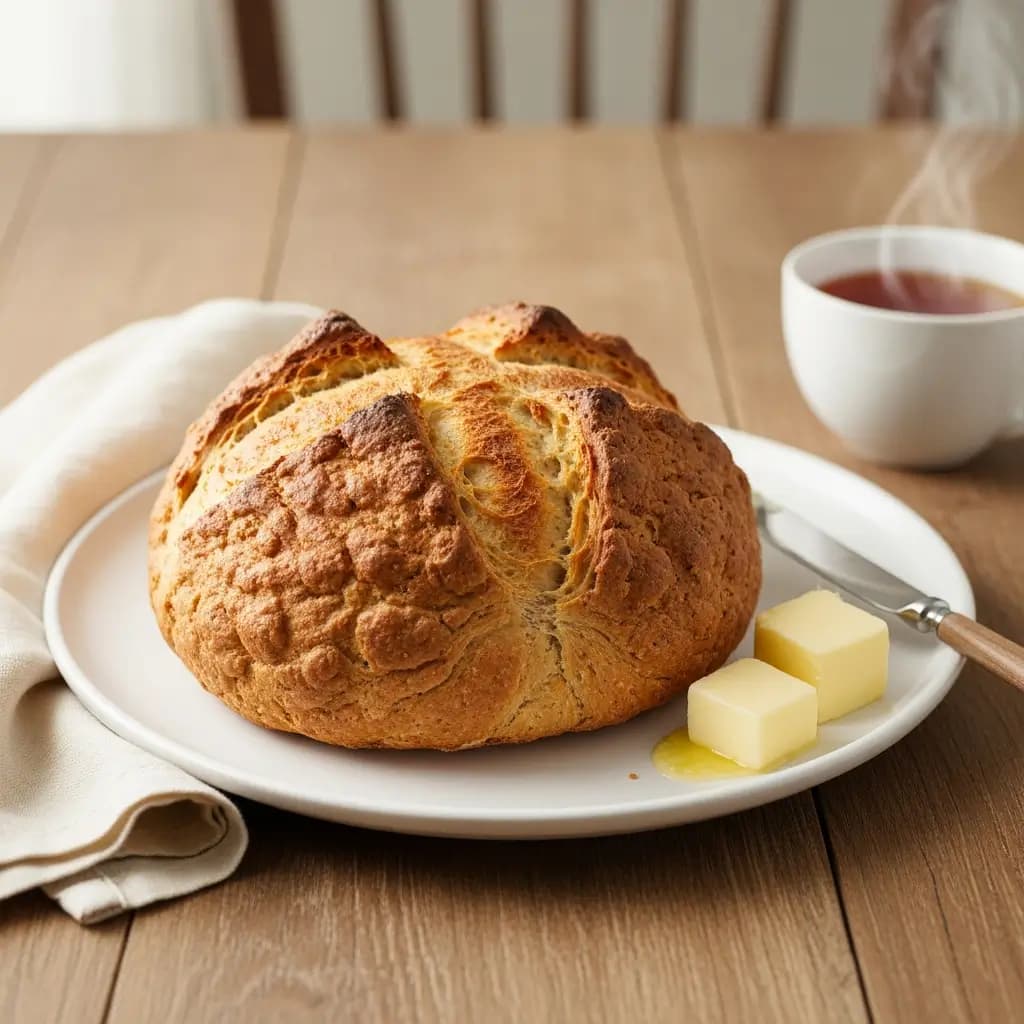
How to Bake Skull Bread: Easy Step-by-Step Halloween Recipe Using a Skull Bread Pan
Updated on November 11, 2025
This post may contain affiliate links.
Jump to a Section:
- Best Skull Bread Pans: Where to Buy & What to Look For
- Ingredients for Skull Bread
- Step-by-Step Instructions for Perfect Skull Bread
- Tips for Using a Skull Bread Pan
- Decorating Your Skull Bread for Maximum Spooky Effect
- Flavor Variations & Creative Ideas
- Storage and Serving Suggestions
- More Halloween Baking Recipes
- Jump to Recipe
Introduction: The Skull Bread Halloween Trend
This Halloween season, there’s one baking trend taking over social media: skull bread. From Instagram to TikTok, home bakers are creating hauntingly beautiful skull-shaped loaves that look almost too spooky to eat. When I first saw these dramatic breads appearing on my feed, I knew I had to try making one—and now I’m completely obsessed.
If you’re searching for the ultimate skull bread pan recipe, you’ve found the perfect guide. This step-by-step tutorial will show you exactly how to create a stunning skull-shaped bread using a specialized skull bread pan. Whether you’re making a savory bread for your Halloween dinner party, a sweet bread for trick-or-treaters, or just want to impress your guests with your baking skills, this recipe delivers dramatic results that are surprisingly easy to achieve.
The best part? You don’t need advanced baking skills. With the right skull bread pan and this foolproof recipe, you’ll create a show-stopping centerpiece that’s as delicious as it is frightening.
The Rise of Skull Bread Pans: Halloween Baking Trend 2025
Why Skull Bread is Everywhere This Year
The skull bread trend exploded in 2025, combining the popularity of novelty baking pans with the ever-growing enthusiasm for elaborate Halloween celebrations. Here’s why everyone is baking skull bread this season:
Social Media Appeal: Skull-shaped bread is incredibly photogenic. The dramatic 3D design, hollow eye sockets, and detailed features create an impressive visual that performs exceptionally well on Instagram, TikTok, and Pinterest. Home bakers love sharing their creations, making this trend viral.
Versatility: Unlike many Halloween-specific items, skull bread pans can be used year-round for Day of the Dead celebrations, Gothic-themed parties, anatomy students, or anyone who appreciates skull aesthetics. The pan isn’t just a single-use gimmick.
Easy Impact: Skull bread looks incredibly complex and professional, but it’s actually quite simple to make. The pan does most of the work, making it accessible for beginners while still impressive enough for experienced bakers.
Dual Purpose: These breads work as both decoration and food. They’re functional centerpieces that guests can actually eat, eliminating waste and adding an interactive element to your party.
The Evolution of Novelty Bread Pans
Skull bread pans join the ranks of other successful specialty baking molds like pumpkin-shaped pans, coffin molds, and brain-shaped cake pans. However, skull pans offer superior detail and more universal appeal, making them the breakout star of Halloween 2025 baking trends.
Best Skull Bread Pans: Where to Buy & What to Look For
Types of Skull Bread Pans
Not all skull bread pans are created equal. Here’s what you need to know before purchasing:
Cast Aluminum Skull Pans
Pros: Excellent heat distribution, creates beautifully detailed skulls, durable and long-lasting, produces professional-looking results
Cons: More expensive (typically $25-40), heavier, requires more careful cleaning
Best For: Serious bakers who want the best results and plan to use the pan multiple times
Recommended Brand: Nordic Ware Skull Pan
Non-Stick Coated Skull Pans
Pros: Easy release, simple cleanup, affordable ($15-25), lightweight
Cons: Coating can wear over time, less detailed definition than cast aluminum
Best For: Casual bakers, beginners, those on a budget
Popular Options: Wilton, Kitchen Craft
Silicone Skull Molds
Pros: Extremely easy release, flexible for removal, dishwasher safe, budget-friendly ($10-20)
Cons: Less crispy crust, can be floppy when full, less detailed features, may need support pan
Best For: Sweet breads, cakes, and softer doughs rather than crusty artisan breads
Where to Buy Skull Bread Pans
- Amazon: Widest selection, customer reviews, quick shipping
- Williams Sonoma: Premium options, excellent quality
- Sur La Table: Specialty baking equipment, seasonal availability
- Target/Walmart: Budget-friendly options during Halloween season
- Etsy: Unique, handcrafted options from independent makers
Features to Look For
✓ Capacity: Most skull pans hold 6-8 cups of dough—check your recipe yield
✓ Detailed Features: Look for well-defined eye sockets, nose cavity, teeth, and bone structure
✓ Flat Base: Ensures the skull sits stable when baking and displaying
✓ Quality Material: Heavy-gauge metal or thick silicone for even baking
✓ Non-Stick Coating or Surface: Makes removal easier and reduces sticking
Care and Maintenance
- Always grease thoroughly, even if labeled “non-stick”
- Hand wash cast aluminum pans to maintain coating
- Silicone molds can go in the dishwasher
- Store carefully to avoid denting or warping
- Season cast iron or uncoated pans before first use
Ingredients for Skull Bread
This versatile recipe works beautifully in a skull bread pan and can be adapted for sweet or savory variations.
For the Bread Dough:
- Warm Water (360ml / 1½ cups): Heated to 110°F for yeast activation
- Active Dry Yeast (2¼ teaspoons / 1 packet): Provides rise and structure
- Granulated Sugar (2 tablespoons): Feeds the yeast and adds subtle sweetness
- All-Purpose Flour (480-540g / 4-4½ cups): Creates the structure
- Salt (2 teaspoons): Essential for flavor development
- Olive Oil or Melted Butter (3 tablespoons): Adds richness and tender crumb
- Optional: Activated Charcoal Powder (1-2 teaspoons): For dramatic black skull bread
For Greasing the Pan:
- Butter or Non-Stick Spray: Generous coating prevents sticking
- Flour: Light dusting after greasing ensures clean release
For Finishing (Optional):
- Melted Butter: Brushed on after baking for glossy finish
- Garlic Butter: For savory version
- Egg Wash: Brushed before baking for golden color (1 egg + 1 tablespoon water)

How to Bake Skull Bread: Easy Step-by-Step Halloween Recipe Using a Skull Bread Pan
Equipment
- Skull bread pan (6-8 cup capacity) Large mixing bowl Wooden spoon or dough hook Pastry brush Kitchen towel or plastic wrap Wire cooling rack Instant-read thermometer (optional)
Ingredients
Instructions
- 1
In large bowl, combine warm water, sugar, and yeast. Let sit 5-10 minutes until foamy.
- 2
Add 4 cups flour, salt, and oil (plus charcoal powder if using). Mix until shaggy dough forms.
- 3
Turn onto floured surface and knead 8-10 minutes until smooth and elastic, adding remaining flour as needed.
- 4
Place dough in greased bowl, cover, and let rise in warm place for 60-90 minutes until doubled.
- 5
Meanwhile, generously grease skull bread pan with butter, getting into all details. Dust lightly with flour.
- 6
Punch down risen dough. Shape into ball and press firmly into prepared skull pan, pushing dough into all features and details.
- 7
Cover and let rise 30-45 minutes until puffy and rising above pan rim.
- 8
Optional: Brush exposed dough surface with egg wash.
- 9
Preheat oven to 375°F (190°C). Bake for 35-45 minutes until deep golden brown and internal temperature reaches 190-200°F. Tent with foil if browning too quickly.
- 10
Cool in pan for exactly 15 minutes. Run knife around edges, then invert onto cooling rack. Let cool completely before slicing.
Notes
Grease the pan extremely well to prevent sticking
Don’t overfill—use only 2/3 to 3/4 of pan capacity
Unmold at 15 minutes while still warm for best release
Recipe can be adapted for sweet or savory variations
Works with most bread recipes, but avoid very wet doughs
Step-by-Step Instructions for Perfect Skull Bread
Step 1: Activate Your Yeast
In a large mixing bowl, combine warm water (110°F—feels like a comfortable bath), sugar, and yeast. Stir gently and let sit for 5-10 minutes until the mixture becomes foamy and bubbly with a slightly yeasty smell. If your yeast doesn’t foam, it’s dead—start over with fresh yeast or your bread won’t rise.
Step 2: Build Your Dough
Add 4 cups of flour, salt, and oil to the activated yeast mixture. Stir with a wooden spoon until a shaggy dough forms. Turn the dough onto a lightly floured surface and knead for 8-10 minutes until smooth, elastic, and slightly tacky. Add remaining flour gradually only if dough is excessively sticky. Proper kneading develops gluten, which creates structure and texture.
Step 3: First Rise
Place the kneaded dough in a greased bowl, turning once to coat all sides. Cover with a damp kitchen towel or plastic wrap. Let rise in a warm, draft-free place for 60-90 minutes until doubled in size. The dough should pass the “poke test”—when you gently press your finger into it, the indentation should slowly spring back halfway.
Step 4: Prepare Your Skull Bread Pan
While the dough rises, generously grease your skull bread pan. Use softened butter and a pastry brush to get into every crevice—the eye sockets, nasal cavity, teeth details, and all the bone contours. This step is crucial for clean release. After buttering, dust lightly with flour, tapping out excess. For extra insurance, you can use baking spray with flour.
Step 5: Shape and Fill the Pan
Punch down the risen dough to release air bubbles. On a lightly floured surface, shape the dough into a ball. Press and stretch it to roughly match the size of your skull pan. Carefully place the dough into the prepared pan, pressing gently but firmly into all the details—push dough into the eye sockets, nose, and around the teeth. Don’t rush this step—proper filling ensures all the skull features show in the final bread.
Step 6: Second Rise
Cover the filled pan with a kitchen towel and let rise for 30-45 minutes until the dough is puffy and rises slightly above the pan rim. Don’t skip this second rise—it creates the light, airy texture you want. The dough should look pillowy and nearly fill the pan.
Step 7: Optional Egg Wash
For a beautiful golden-brown finish, whisk together 1 egg and 1 tablespoon of water. Gently brush this egg wash over the exposed surface of the dough. This creates a gorgeous shiny crust and helps with browning.
Step 8: Bake to Perfection
Preheat your oven to 375°F (190°C). Place the skull pan on the middle rack and bake for 35-45 minutes. The bread is done when it’s deep golden brown on top, sounds hollow when tapped, and reaches an internal temperature of 190-200°F. Check at 30 minutes—if the top is browning too quickly, tent loosely with aluminum foil for the remaining time.
Step 9: Cool and Unmold
This is the most nerve-wracking but exciting step! Let the bread cool in the pan for 15 minutes—no longer or it may stick. Run a butter knife carefully around the edges and along any seams. Place a wire cooling rack or serving platter over the pan, and in one confident motion, flip it over. Gently lift off the pan. If any pieces stick, carefully reattach them while the bread is still warm. Let cool completely on the rack before slicing or decorating.
Tips for Using a Skull Bread Pan
Essential Tips for Success
Grease Like Your Life Depends On It: The #1 cause of skull bread disasters is inadequate greasing. Use more butter or spray than you think necessary, especially in the detailed areas. Get into every single crevice with a pastry brush.
Don’t Overfill the Pan: Fill the pan only 2/3 to 3/4 full with dough. Overfilling causes the bread to overflow, lose detail, and create cleanup nightmares. It’s better to have slightly less than too much.
Support Silicone Molds: If using a silicone skull mold, place it on a sturdy baking sheet before filling. The flexibility that makes silicone great for removal makes it floppy when handling.
Time Your Unmolding: Cool for exactly 15 minutes—not less, not more. Too soon and the bread falls apart; too long and it sticks permanently.
Tap and Listen: Before unmolding, tap the bottom of the pan. You should hear a hollow sound, indicating the bread has pulled away slightly from the sides.
Use Parchment Strips: For extra insurance, cut strips of parchment paper and press them into the pan before greasing. Leave ends hanging over the sides as “handles” to help lift the bread out.
Temperature Matters: Room temperature dough is easier to press into details than cold dough. If your dough seems stiff, let it rest at room temperature for 10 minutes before shaping.
Don’t Skip the Flour Dusting: After greasing, the light flour dusting creates a barrier that prevents sticking while helping capture detail.
Troubleshooting Common Problems
Problem: Bread sticks in pan
Solution: Next time, grease more heavily and unmold at exactly 15 minutes while still warm
Problem: Lost detail in features
Solution: Press dough more firmly into crevices during filling; use stiffer dough with less water
Problem: Top is too dark before inside is cooked
Solution: Tent with foil at 25-30 minutes; reduce oven temperature by 25°F
Problem: Bread collapsed when unmolding
Solution: Let it cool longer (20 minutes) or ensure it’s fully baked—check internal temperature
Problem: Uneven browning
Solution: Rotate pan halfway through baking; use oven thermometer to verify temperature accuracy
Decorating Your Skull Bread for Maximum Spooky Effect
Classic Decoration Ideas
Black Skull Bread: Add 1-2 teaspoons activated charcoal powder to the dough for dramatic black bread. The charcoal is tasteless and food-safe, creating an incredibly striking effect.
Edible Glitter or Dust: Brush the cooled skull with light corn syrup, then dust with edible pearl dust, black edible glitter, or gold luster dust for a glamorous, gothic look.
Herb Butter Glaze: Immediately after unmolding, brush with melted garlic herb butter. This adds incredible flavor and creates a glossy, appetizing finish.
Cream Cheese Eyes: Pipe cream cheese or white icing into the eye sockets and add black olive slices for pupils. Creates an eerie staring effect.
Sesame Seed Teeth: Before baking, carefully place sesame seeds in the teeth grooves to highlight the dental details.
Creative Serving Ideas
Bread Bowl Skull: Hollow out the back of the skull bread and fill with spinach dip, cheese dip, or soup for an interactive appetizer.
Stuffed Skull Bread: Before baking, place a ball of mozzarella in the center of the dough for a “brain” surprise when sliced.
Charcuterie Skull: Slice and serve the bread as part of a Halloween charcuterie board with themed crackers, cheeses, and meats.
Sugar Skull Sweet Bread: Make a sweet version and decorate with royal icing in traditional Dia de los Muertos sugar skull patterns.
Savory Herb Crust: Before the second rise, brush with olive oil and sprinkle with rosemary, garlic, and sea salt for an aromatic, savory crust.
Flavor Variations & Creative Ideas
Savory Skull Breads
Garlic Parmesan Skull: Add 4 cloves minced garlic and ½ cup grated parmesan to the dough. Brush with garlic butter after baking.
Everything Bagel Skull: Brush with egg wash and sprinkle generously with everything bagel seasoning before baking.
Jalapeño Cheddar Skull: Fold in 1 cup shredded sharp cheddar and ¼ cup diced pickled jalapeños.
Rosemary Olive Oil Skull: Replace water with equal parts water and olive oil. Add 2 tablespoons fresh chopped rosemary.
Caramelized Onion & Gruyere: Fold in ½ cup caramelized onions and ¾ cup shredded gruyere cheese.
Sweet Skull Breads
Cinnamon Sugar Skull: Add 2 teaspoons cinnamon to dough. Brush with butter and roll in cinnamon sugar after unmolding.
Chocolate Chip Skull: Fold in 1 cup chocolate chips for a sweet treat perfect for kids.
Pumpkin Spice Skull: Replace 1 cup water with 1 cup pumpkin puree. Add 2 teaspoons pumpkin pie spice.
Orange Cranberry Skull: Add zest of 2 oranges and ¾ cup dried cranberries for festive fall flavor.
Nutella Swirl Skull: Roll out dough, spread with Nutella, roll up, then place in pan for a marbled effect.
Storage and Serving Suggestions
Storing Your Skull Bread
Room Temperature: Store in an airtight container or wrapped tightly in plastic wrap for up to 3 days at room temperature. Add a slice of bread to the container to maintain moisture.
Refrigerator: While not ideal for texture, refrigerated skull bread lasts up to a week. Let come to room temperature or warm slightly before serving.
Freezing: Wrap cooled skull bread tightly in plastic wrap, then aluminum foil. Freeze for up to 3 months. Thaw overnight at room temperature, still wrapped.
Refreshing Day-Old Bread: Wrap in aluminum foil and warm in a 300°F oven for 10-15 minutes. This revives the crust and softens the interior.
Serving Suggestions
Halloween Dinner Centerpiece: Place the skull bread on a bed of fresh herbs or autumn leaves as a dramatic table centerpiece. Let guests tear off pieces.
Sliced for Appetizers: Slice and serve with flavored butters, olive oil and balsamic, or as a base for bruschetta toppings.
Soup Accompaniment: Serve alongside tomato soup, pumpkin soup, or chili for a themed Halloween meal.
Party Platter: Cube the bread for fondue, arrange slices around dips, or use as a base for crostini.
More Halloween Baking Recipes
Love this skull bread? Try these other spooky baked goods:
-
Same-Day Sourdough Discard Pumpkin Bread: Perfectly spiced fall quick bread that’s moist and flavorful
-
Sourdough Apple Fritter Bites: Crispy, cinnamon-spiced treats perfect for autumn
Did you make skull bread? We’d love to see your creations! Share your photos and tag us on social media. Subscribe to our newsletter for more seasonal baking recipes and Halloween ideas!